Regenerating sealed lead acid batteries
By design sealed lead acid batteries are, by their very nature, sealed. This means that if they have been damaged by ovecharging and have dried out then it is problematic to restore them. Ironically it is possible to do this damage in the first place because they aren't completely sealed. There is a rubber cap on top of each cell. This cap is a snug fit but it is not absolutely sealed. If a lead-acid battery is charged too much then the water contained within them can electrolyse to hydrogen and oxygen. This process is called gassing. If the charging isn't too rapid then the hydrogen and oxygen recombine within the cell and re-form to water: no harm done. However, if the charging is far too rapid, the gases are lost around the rubber caps leading to a lower electrolyte level. Ultimately this can destroy the battery and prevent it from holding a charge at all.
Recently, I had a normally faithful torch give up and die. It wouldn't hold any charge and turned off soon after turning it on. It contained a 12V 7Ah sealed lead acid battery. I took the battery out and decided to see if I could repair it.
Investigating the battery
The first thing I did was to pry off the plastic lid covering the 6 cells. This was held on with just some glue and snapped off relatively easily with some forecful jabbing from a screwdriver. If I'm going to re-attach the lid I'll need either some fresh glue or some tape. With the cover removed, you can easily see the 6 cells and their respective rubber caps. It's around these caps that gases will vent if the battery is overcharged.
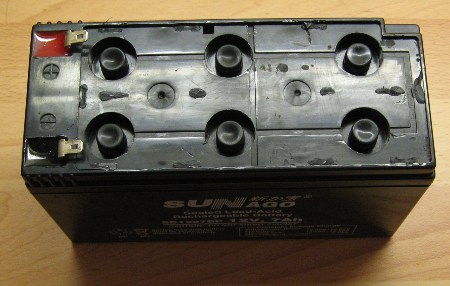
6-cell sealed lead acid battery with its plastic cover prized off
Once the cover was off, I prepared for the remainder by gathering my tools and materials:
- Battery top-up water. This must be pure i.e. distilled, reverse osmosis or similar or it will contaminate the battery. Tap water is not sufficiently pure.
- Needle-nose pliers
- Plastic pipette - Any device which can suck up and dispense water into narrow places will do. Running water off the handle of a teaspoon will work in a pinch.
- Torch (to see into the cells)
I pried off the caps to each cell and placed them to the side which gives free access to the interior of each cell.
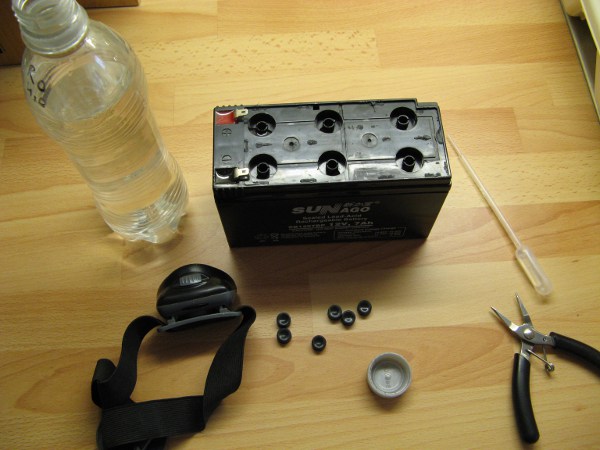
The same battery with its caps removed and a selection of tools
Using the torch, it is possible to peer down into the open cells. There are lead plates which in the case of this battery are heavily sulphated, indicating a poor level of charge. In the highly charged state, a lead acid battery will revert to lead and sulphuric acid, only becoming lead sulphate when discharged. It's quite difficult to photograph the inside of the cells but the photo below is good enough to see that there is no liquid above the plates. In a battery in a good state of repair, the liquid level is usually up near the top of the cells, or more often over the top of the plates.
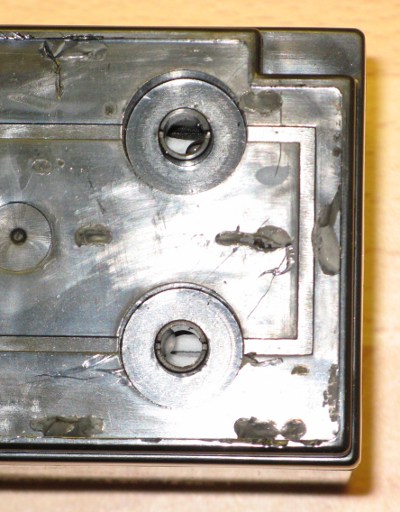
Inside a couple of the cells. The grey lead plate in the middle of the sandwich inside the lower cell is clear as are the thick layers of white lead sulphate on either side of it. The fluid level is not visible.
Since sulphate is non-volatile, its amount in a battery is fixed. The only thing that has been removed from the battery by overcharging is water. I replaced the water using fresh distilled water up to a level just above the plates.
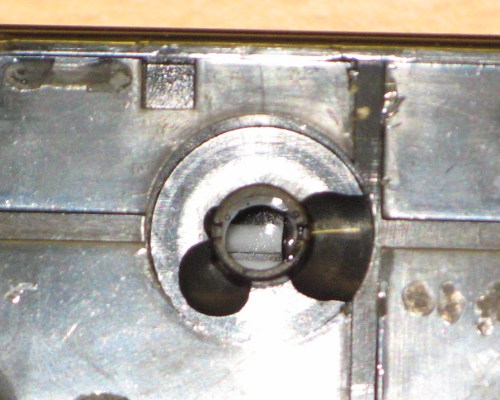
Water topped up inside a cell. The surface of the water is visibile above the top of the lead plates, even if it doesn't photograph well.
Once the fluid had been topped up, I replaced the caps and began trying to charge the battery. It's very important to make sure that the caps are back on before charging and that the top of the battery is covered! If the charging evolves gas, the caps could pop off or acid could be spat out. I used a piece of paper towel to cover the top of the battery during the initial charge.
Important! Make sure you cover the top of the battery before attempting to charge it!
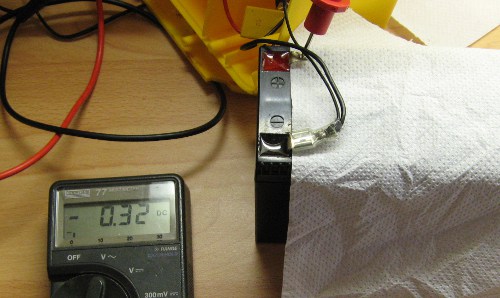
Charging a repaired battery. Note the covered caps to prevent expulsions of acid during the charging.
Conclusions
In this case, the battery took charge at about 0.3A indefinitely but did not actually store any charge. Gas was evolved during the charging process because the caps popped off under the paper towel but the battery was not able to light the torch for any time. Whilst the torch was apart I looked at the charge control circuitry and discovered that it wasn't controlling the charge at all! Instead, it was applying the full 18.6 volts from the transformer straight across the battery - a sure fire way to destroy it over the time that I had been using the battery (a couple of years of light use).
In the end, I built a small charge controller circuit to limit voltage and current but the original battery was beyond repair. Despite not being able to save the battery, the techniques should be useful in the future.
First published on 30th December 2010 and last modified on 16th March 2011.