Home cider fermentation
We recently moved into a house with apple trees in the garden so decided to have a go at making cider. The process is relatively simple and is described excellently by Andrew Lea at The Wittenham Hill Cider Pages. As such, these pages just give details on our particular product and includes some of our tips.
The Apples
The first step was the apples. I'm not sure of the variety but they look similar to a Worcester. The trees were planted around 50 years ago so are more likely to be a traditional English variety. We used a mixture of salvageable wind-falls and picked fruit and used a total of around 47kg of apples.
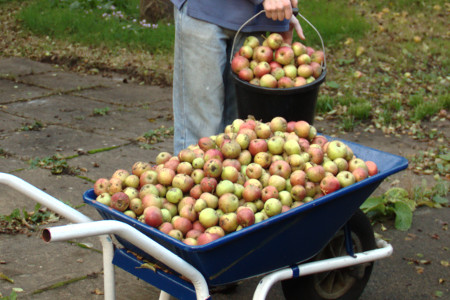
Some of our collected apples in a barrow
Juicing
We used an old domestic juicer we had access to. It was made in the 1950s and was considerably more impressive than I would expect a "domestic" juicer to be, especially nowadays. It uses a high speed rotating cutting disc which the fruit is pushed against. The pulp is spun and the juice recovered by centrifugation. There was no need to prepare the fruit in any special way. We only roughly chopped out any mouldy bits from windfall apples, washed them to remove mud, snails etc. then chopped them small enough to fit down the feeding chute in the juicer. The main problem we had was the noise! This machine is well over 90dB in action and I had to use ear defenders for prolonged juicing.
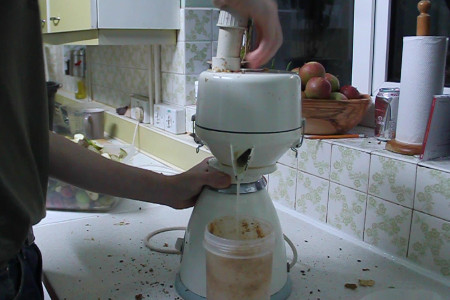
The juicer in action
After around a kilo of fruit has been juiced, you have to disassemble the machine and extract the dry "pomace" inside. This wasn't as dry as I'd hoped and if I'd had a suitable press, I could have recovered more juice. That being said, it wasn't really wet so I was happy. Most of the pips are still intact and there is some skin still intact.
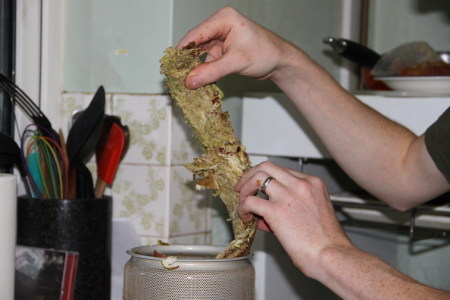
Dry pomace coming out of the juicer
In the end, from our 47kg of apples, we extracted around 28L of juice. This is a juice extraction ratio of approximately 60%. I think this is a little low but this can be attributed to two factors: 1 - we used a variety of windfall apples as well as picked apples and we discarded a relatively large percentage of damaged fruit (perhaps 5% total mass discarded) and - 2 - some of the apples were under-ripe and thus not particularly juicy. We transferred the juice to a fermentation drum which had been pre-sterilised using sodium metabisulphite in hot water.
Beginning the fermentation
This juice was delicious to drink straight away so it seemed a shame to ferment it. Then again, how are you supposed to preserve that much juice? What better way than to make cider! The first thing we did was to measure specific gravity using a hydrometer and pH using a commercial pH meter at work (pH paper with a 0.1 unit resolution would have been fine too). Our juice had a SG of 1.026 and a pH of 3.54. According to Andrew Lea's site this SG is too low to produce a sufficient alcohol concentration to preserve the juice but the pH is acceptable.
Based on these readings, we decided that we should add extra sugar to the juice to raise the specific gravity. We chose a target alcohol concentration of 6.5% and so we aimed to raise the SG to around 1.045. We did this by dissolving sugar in a portion of the juice then re-adding the dissolved sugar to the main drum. This meant that we didn't end up with undissolved sugar at the base of the drum. In the end, we added around 800g of sugar to the 28L of juice. This left us with a final SG of 1.050.
Next we added finely crushed Campden tablets (containg sodium metabisulphite). We used 17 tablets based on the acidity of our juice and the volume and with reference to the table on Andrew Lea's site, specifically because our pH was between 3.5 and 3.8, we should have used 3 tablets per gallon (4.54 litres). As our pH was only just into this range, we chose a number just lower than what we should have used (18.5 tablets) so as to minimise the amount of sulphite added.
The pulverised Campden tablets were added and stirred in and then the juice was left under an air trap for 24 hours before we added yeast nutrients according to the manufacturer's instructions. We used a yeast nutrient mix from Wilkinson (product code 0022654) but I'm sure others are suitable. Finally, we added 2 sachets of Wilkinson's Universal Wine Yeast immediately after the nutrients. We were unsure how much yeast we would need. In hindsight, we could have got away with a single sachet at the expense of a little more of a delay before the fermentation got going properly.
The fermentation took a few days to get going as it was. We added the yeast at 20:00 on 28th October and didn't notice any bubbles until the afternoon of the 30th October. The fermentation finished abruptly and I didn't notice exactly when it stopped. It sat on its "leas" for a few days (i.e. the dead yeast layer) and then we siphoned the supernatant into a fresh container, cleaned out the dead yeast and put it back under the air trap again. This is to encourage any fermentation to complete before bottling. At all times, we tried to minimise air contamination but didn't add any more sodium metabisulphite.
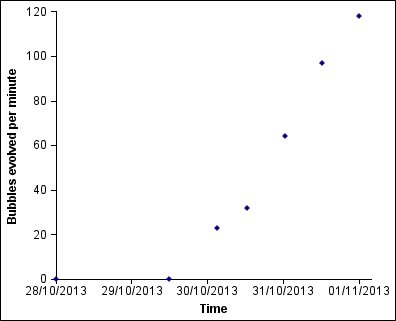
Bubble evolution against time. The first data point is when we added the yeast.
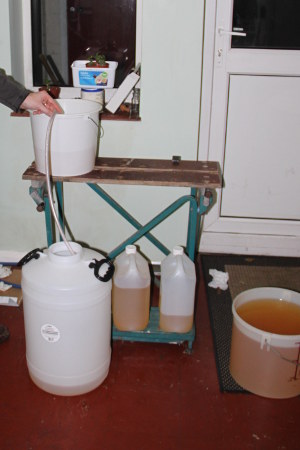
Siphoning back into the drum after cleaning out the leas
Bottling
After we were happy with the fermentation being completed, we tasted the cider and decided it was unaceptably dry. We were tempted to correct this by adding more sugar but if we didn't kill the remaining yeast effectively, this would lead to a secondary fermentation in the bottle with potentially explosive consequences. Instead, we used Splenda Sweetminis which are sucralose tablets. We added 30 in pre-dissolved form to the 28L of juice for an acceptable final taste. Before deciding on these tablets, we tried both aspartame and sacharin tablets but found both to be inferior to the sucralose for taste.
The final step was clarification by addition of "finings". The cider was very cloudy at this point so we added 60g (two sachets) of Wilkinson beer finings which contain chitin and causes coagulation and precipitation of the cloudy material. We were meant to leave this for 48 hours but only left it 24. As a result, the precipitation finished in the bottle leaving a slight sediment in each bottle. Just before bottling, we added a further 4 Campden tablets to help preserve the final product. We are unsure if this is strictly necessary but did it as we are novices at this whole process. We chose 4 because it allowed us to keep the total SO2 concentration added to be kept below 200ppm.
After the precipitation was "complete", we proceeded to bottle the clear cider in sterilised bottles. Each bottle was sterilised by giving it a foil cap and then heating it in the oven to at least 120°C for 10 minutes. After the bottles were allowed to cool, the cider was siphoned into the bottles and they were finally corked with corks pre-sterilised in boiling water for a few minutes. A fancy label finished off the bottling nicely. The overall taste is quite simple but acceptable. I think it may be a little too dry for the mainstream palate but some more sweetner would remedy this if needed.
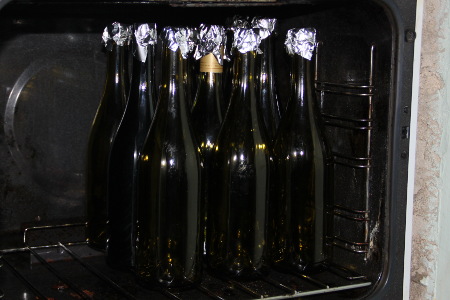
Bottle sterilisation in the oven.
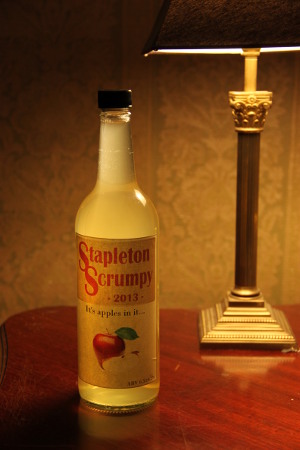
Stapleton Scrumpy - Cheers!
Published on 27th December 2013.