Fixing the focus on a Canon EFS 18-135mm lens
I managed to break the focusing on my Canon 18-135mm lens recently by smacking it hard against my knee whilst it was around my neck. There's only 3 options at this point:
- Buy a new/second hand lens replacement
- Send the lens in for professional repair
- Try a repair myself
What was broken was that the focus ring wouldn't move through its full range of motion. I could focus on near objects but not far objects and the effect was worse when using the more telephoto portion of the zoom range. The problem was apparent in both auto- and manual-focus modes. In manual focus, I couldn't budge the ring past half way and in auto-focus, the motor would whine with an unusual sound and not manage to move the focus past the same focal range.
Fixing the lens
There are a number of sites which detail fixing other problems on Canon lenses. There is also one site I found which has exploded views and parts lists (see the references section below for full details. Unfortunately, I found no information specific to my lens but unsuprisingly it turns out that mine isn't that different to similar Canon lenses.
Step 1: Removing the lens mount
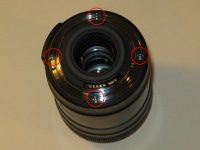
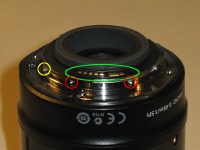
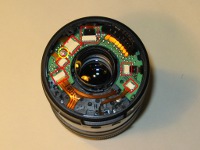
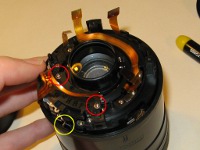
The first step was to remove the metal lens mount from the back of the lens. Begin by removing the four screws highlighted in the first photo. Now the metal ring is free to move but is still attached because the contact strip (green ring in 2nd photo) is still attached. To remove the contact strip, begin by removing the two screws highlighted red in the 2nd photo. Do not remove the screw highlighted in yellow.
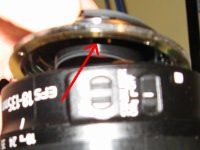
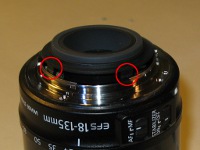
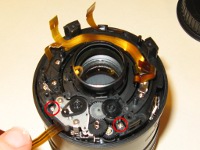
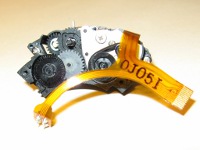
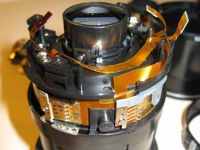
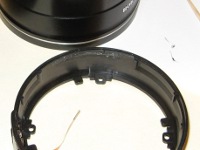
Now is the trickiest part of the whole procedure. The inner plastic ring is clipped to the outer metal ring with a series of four lugs. In order to separate the two parts, at least 2 of the lugs must be prised out. To get to the lugs, gently lift the metal ring whilst it is still attached. Do not pull too hard or lift too far as the contact strip is fragile and damaging it could prevent the lens communicating with the camera. It is best to lift the ring on the opposite side to the contact strip. The lugs are about where the red arrow points in the 3rd photo and can be pried out with a flat-bladed screwdriver. It was difficult to photograph exactly so for reference the 4th photo shows the plastic ring with its lugs after it has been released but before it was removed completely.
Once the lugs have been unclipped, the lens mount will practically fall off the camera and can be removed.
Step 2: Removing the circuit board assembly
The main circuit board in the lens is held down with one screw (circled in yellow below). It also has 6 push-fit ribbon cables attached which are used for various sensors/switches/motors throughout the lens. Each of the ribbons can be gently pulled out using a pair of fine nosed pliers and the screw can be removed. The circuit board will then come off the lens. At this point, the plastic ring holding the auto/manual focus switch can be removed easily.
At this point, I wasn't sure what to remove next. What I did was remove the cover to the auto-focus motor assembly (red circles in the 2nd photo below). However, I wouldn't recommend doing this because it turns out the whole assembly can be removed intact by undoing different screws. These screws are easily seen in the third photo (red circles) and are accessible when the assembly is intact. I ended up re-assembling the mechanism on the desk and putting it aside as a whole unit for re-attachment later. The yellow circle in the 2nd photo is the lever which disengages the motor for manual focusing of the lens. It's spring loaded and needs to be held up whilst the lens is disassembled if you wish to turn the focusing ring.
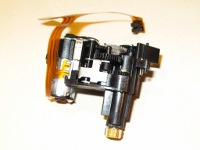
If you're interested, here's some photos of the motor assembly showing the drive belt, step-down gears and an encoder wheel with optical sensor as well as the lens without the assembly in place.
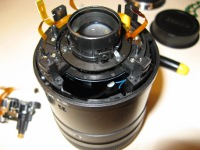
Once the motor assembly is removed, the main plastic barrel that forms the body of the lens can be removed
Step 3: Removing the main barrel
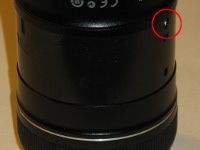
The main barrel of the camera is a single piece of plastic and is held on by a single screw. To remove it, first remove the rubber grip by gently lifting it from the body with a flat-bladed screwdriver. It can then be stretched over the end of the lens. The screw (circled in red) is removed and the whole tube twists and lifts off the lens with virtually no force.
Step 4: Identifying and fixing the problem
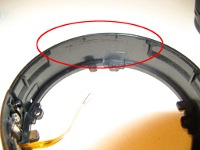
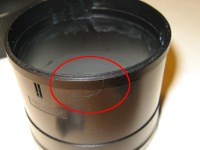
At this point, I could see that the focus mechanism was working properly. This meant that there must be something wrong with the parts I had already removed. Close inspection revealed that some of the plastic was cracked which meant that it was out of place and interfering with the mechanism (ringed).
To fix this, I carefully used superglue to set the pieces back in position. Once the glue had dried, I sanded it down to be flush and then cleaned the area with a damp tissue to remove dust formed by sanding.
After making sure the repair was good, I re-assembled the lens. This was an exact reversal of each of these steps making sure to attach each of the ribbon cables carefully. Also, make sure that the focus switch is set to auto-focus as the mechanism is spring loaded and will return to auto-focus once taken apart.
After re-assembly, I checked the lens and it works perfectly. A good result and a nice saving on a professional repair.
References
- Repairing defective autofocus on Canon EF-S 18-55mm lens
- Fixing Canon 50mm f/1.4 lens
- How to disassemble the Canon EF 50 1.8 II lens
- Canon EFS 17-85mm IS stuck/locked zoom repair/disassembly
- Canon lenses: exploded views and parts lists
First published on 12th November 2012 and last modified on 15th November 2012.
