Zinc extraction and brass-coating copper coins
There are numerous videos and descriptions on the internet of how to brass-coat copper coins. The effect can be brilliant when done well so here's how I made my own.
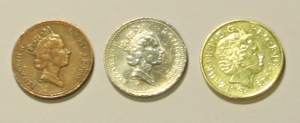
Finding zinc
The process is critically dependent on a source of zinc metal as it is zinc and copper which alloy together to make brass. The simplest source of zinc to come across in a domestic situation is ordinary zinc-carbon batteries. These are among the cheapest type of battery cell available. As an example, mine only cost me £1 per pack of four. Any type or size should do but make sure that they specify zinc-carbon on the packet. If they are described as alkaline at any point, they are unsuitable as zinc-carbon batteries use an acidic electrolyte.
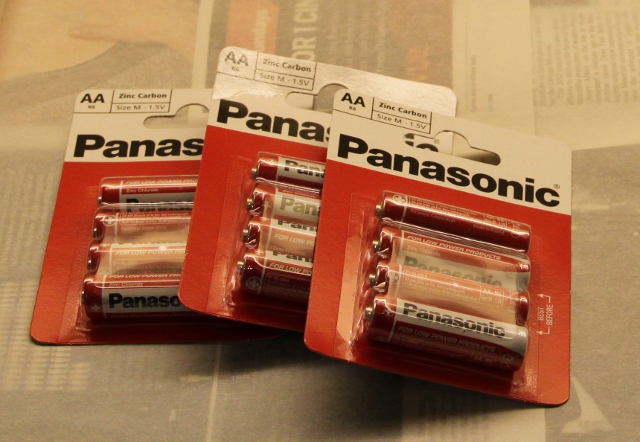
My zinc-carbon batteries (other brands are available!)
The reason zinc-carbon batteries are useful as a source of zinc is that they use a solid metallic zinc casing as an anode. There is a nice primer on zinc-carbon batteries available here.
Disassembling the batteries
To begin with, prepare an area to work over. I have covered my surface with a heavy layer of newspaper followed by a sheet of kitchen grease-proof paper to catch bits that fall off the batteries. The inside of these batteries contains carbon black powder which gets everywhere if you're not careful and stains many surfaces. I have a selection of tools as well to help me take the batteries apart. Importantly, I have:
- Sharp nosed pliers
- Stanley knife or similar
- An old teaspoon
- Heavy duty scissors
- A small flat-bladed screwdriver
I also have a series of pots to store the components of the batteries once they are disassembled.
The process of taking the battery apart is very simple and I have included a photo below with all the steps together to help. To begin with, use the sharp nosed pliers and remove the steel casing from the outside of the battery (step 2 in the photo below). Next, use the Stanley knife and slice off the insulating plastic sheath (step 3). Next, the plastic cap that surrounds the carbon electrode can be removed by gentle levering with a small screwdriver. This leaves the carbon electrode free to be removed intact by gentle use of pliers and a twisting-pulling motion in line with the long axis of the battery. Once the carbon electrode is removed, use the scissors and cut down the length of the zinc casing as far as you can (shown in a separate photo below). Once open, most of the manganese dioxide, carbon and electrolyte can be scraped out with a small teaspoon. Finally, remove the paper liner and clean the zinc up under a running tap.
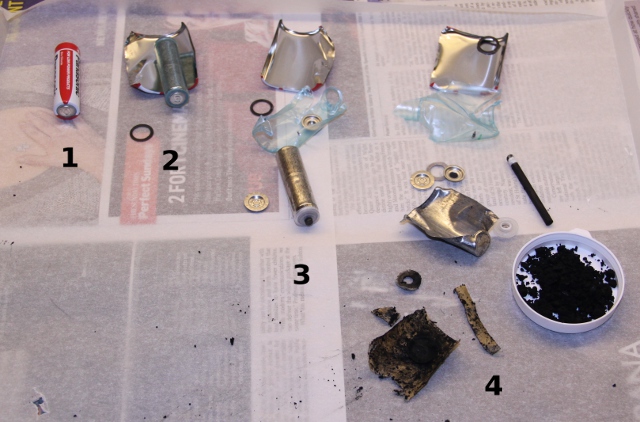
Disassembled batteries. 1 = complete battery, 2 = outer casing off, 3 = plastic sheath and electrode caps off, 4 = completed process. Click to enlarge.
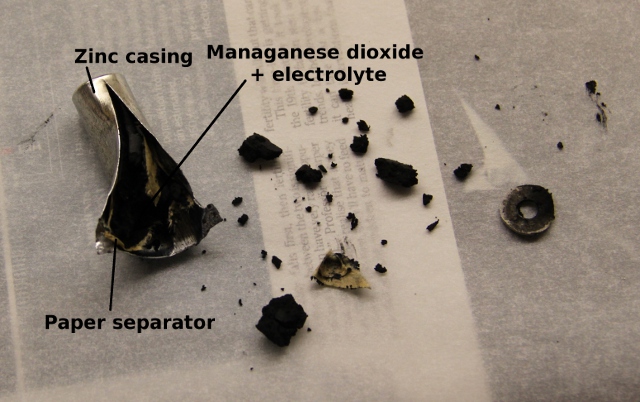
Inside the cut open zinc casing. Click to enlarge.
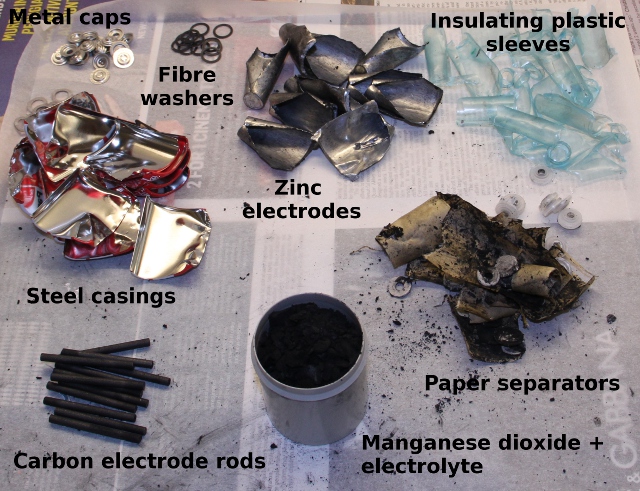
The innards from a number of batteries with descriptions. Click to enlarge.
Coating copper coins
Solution preparation
To coat the copper coins with zinc, I followed the method published by the Nuffield foundation. To begin with, I made a strong (6 molar) solution of sodium hydroxide (NaOH) by dissolving 24 grams in 100mL water. Sodium hydroxide is cheaply and readily available in hardware stores, often under the name "caustic soda". The act of dissolving NaOH in water is highly exothermic and thus causes the temperature of the water to rise significantly. Make sure not to use any metal implements when dissolving or stirring, use plastic or wood if you need to use something. I used a glass jam jar and just swirled the mixture until it had dissolved.
This jar of NaOH solution was put in a saucepan of water and then brought almost to boiling point on a cooker. Meanwhile, whilst it was heating I cleaned some of the zinc battery casings to a shine using iron wool. Once clean and rinsed in fresh water, I added these to the jar of hot NaOH, taking care to turn the gas off before adding them - hydrogen gas is evolved in the reaction between the NaOH and the zinc (forming sodium zincate). Of course because the zinc is in sheet form and not in a powdered form, the surface area to volume ratio is poor and leads to a relatively slow reaction. I let my jar sit for about half an hour with occasional heating and swirling before proceeding. Meanwhile, I prepared the coins.
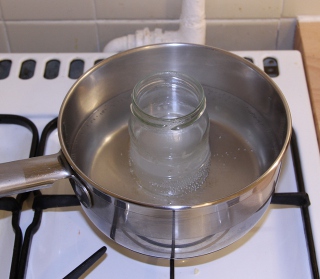
The jar of sodium hydroxide solution in a saucepan of hot water.
Coin preparation and handling
Through a process of trial and error I discovered that it is easy to create a partially coated coin but quite difficuly to achieve a perfect look. To make sure that the coins had the best chance of being perfect, I began their cleaning with an overnight soak in vinegar. This begins the cleaning very nicely and removes most stubborn deposits. It is possible to proceed without this step but it often results in a poor finish, especially with older coins that are more soiled on their surface.

A set of coins at various stages. From left to right: Uncleaned penny, penny after overnight soak in vinegar, penny after Brasso polishing, zinc-coated penny, brass alloyed penny with flawed finish caused by lack of vinegar soak, perfectly alloyed brass penny, a brass-coated 2p coin. Click to enlarge.
After their overnight soak, the coins were rinsed in water and dried before being polished with Brasso, a commercially available metal polish. This gave the coins an "as new" appearance, even if they were heavily marked before. At this point, I stuck the coins in the jar with the NaOH solution and the zinc metal, making sure to have the two metals in direct physical contact for electrical conductivity. The coating process took between 2 and 20 minutes depending on how many coins were in the jar at once (more coins, slower coating) and how long the solution had been preparing before adding coins (younger solution, slower coating). When the coins were coated adequately, they were removed with tweezers and rinsed under the tap. If they were not completely coated or if the coating was thin enough to see the copper colour through, they were placed back in with the zinc.
After the coins were all zinc-coated, the final step is to alloy the zinc with the copper to form brass. This can be achieved by heating the coin in a blue gas flame for a few seconds. The heat causes the zinc to migrate into the surface of the copper, yielding the brass.
The surface coating isn't very thick and because of this it is easily removed. In fact, polishing again with Brasso removed at least some of the coating. I would imagine that daily use of these coins would rapidly allow the base copper to show through again.
Published on 13th February 2012.